Recently I have been testing some software for Presenting, Learning / Web Conferencing, and data sharing, but frankly none of them displayed good results. There are a few paid solutions, but my Open Source nature led me to test the Apache Open Meeting app. OpenMeetings is a software used for presenting, online training, web conferencing, collaborative whiteboard drawing, document editing, and user desktop sharing. The product is based on the OpenLaszlo RIA framework and Red5 media server, which in turn are based on some open source components. Communication takes place in virtual "meeting rooms" which may be set to different communication, security, and video quality modes. The recommended database engine for backend support is MySQL. The product can be set up as an installed server product, or used as a hosted service.
Work on OpenMeetings began in 2006, and it has been downloaded over 250,000 times. OpenMeetings is available in 31 languages.
Official site: http://openmeetings.apache.org/
Working on all major operating systems, but today I will write the tutorial based on the latest 3.1.4 version on CentOS version 6 and 7 Linux (dedicated server / compatible with Xen/KVM if virtual).
1) First we must modify Selinux level security for the installation:
yum install -y nano
sudo nano /etc/selinux/config
…modify from:
SELINUX=enforcing
...to
SELINUX=permissive
or if SELINUX not needed SELINUX=disabled
2) Now we must update the operating system. Note: this is the recommended action, not required
yum update -y
For kernel changes and the new Selinux configuration to take effect, push:
reboot
3) Next will be to add Repositories. (you may get files to /root or /opt it does not matter)
yum install -y wget
EPEL & Remi:
wget -c http://epel.mirror.nucleus.be/7/x86_64/e/epel-release-7-5.noarch.rpm
wget http://rpms.famillecollet.com/enterprise/remi-release-7.rpm
sudo rpm -Uvh remi-release-7*.rpm epel-release-7*.rpm
Enable Remi:
nano /etc/yum.repos.d/remi.repo
And modify (the first enabled):
From enabled=0 to enabled=1
ElRepo
rpm --import https://www.elrepo.org/RPM-GPG-KEY-elrepo.org
rpm -Uvh http://www.elrepo.org/elrepo-release-7.0-2.el7.elrepo.noarch.rpm
Nux
rpm -Uvh http://li.nux.ro/download/nux/dextop/el7/x86_64/nux-dextop-release-0-
5.el7.nux.noarch.rpm
(copy as one line)
Lastly, in this step we need to install Adobe repo 64-bit x86_64 For Flash player. Push:
rpm -ivh http://linuxdownload.adobe.com/adobe- release/adobe-release-x86_64-1.0-1.noarch.rpm
rpm --import /etc/pki/rpm-gpg/RPM-GPG-KEY-adobe-linux
yum update -y
YYou can always confirm if the package was successfully installed using rpm -qa, for example:
rpm -qa | grep adobe
4) Installation of Oracle Java 1.8. Java 1.8 is necessary for OpenMeetings 3.1.4. Java 1.7 can be used only for the previous OM versions. We shall install Java 1.8 now.
cd /opt
Download the file:
(All in one line only. 1ª and 2ª without space between them. A space to the 3ª)
wget --no-cookies --no-check-certificate --header "Cookie:gpw_e24=http%3A%2F%2Fwww.oracle.com%2F;oraclelicense=accept-securebackup-cookie" "http://download.oracle.com/otn-pub/java/jdk/8u101-b13/jdk-8u101-linux-x64.rpm"
And then install it:
rpm -ivh jdk-8u101-linux-x64.rpm
Maybe you have installed various versions of Java. We select the just installed Oracle Java:
update-alternatives --config java
And to see if the selected version is active:
java -version
Alternatively, you can simply run:
sudo yum install java-1.8.0-openjdk icedtea-web
And everything should work as expected, but it is recommended that you choose the latest 1.8 version.
5) OpenMeetings will need LibreOffice to convert pdf, which can be uploaded through Dashboard. To install LibreOffice:
yum -y install libreoffice libreoffice-headless
6) Installation of necessary packages and libraries:
yum install -y libjpeg libjpeg-devel ghostscript freetype freetype-devel unzip gcc gcc-c++ ncurses
ncurses-devel make zlib zlib-devel libtool bison bison-devel openssl-devel bzip2 bzip2-devel fileroller git autoconf automake pkgconfig tomcat-native nmap vlc
(Copy as one line with space)
7) Now we are going to need ImageMagick, Sox and Swftools. ImageMagick, works with image filetypes jpg, png, gif, etc. Lets get that installed:
yum install -y ImageMagick giflib giflib-devel giflib-utils
Next is Sox, which deals with Sound. We will need to compile it with the latest version:
cd /opt
wget -c http://sourceforge.net/projects/sox/files/sox/14.4.2/sox-14.4.2.tar.gz
tar xzvf sox-14.4.2.tar.gz
cd /opt/sox-14.4.2
./configure
make && make install
Swftools. LibreOffice converts the uploaded office files to pdf, and Swftools converts these pdfs to
swf (flash file), which can later be presented on the whiteboard. Also convert jpg2swf, png2swf, gif2swf, and etc.
Don´t compile the newer version, since they don't have pdf2swf, which is necessary.
cd /opt
wget -c http://www.swftools.org/swftools-2013-04-09-1007.tar.gz
tar xzvf swftools-2013-04-09-1007.tar.gz
cd /opt/swftools-2013-04-09-1007
./configure --libdir=/usr/lib --bindir=/usr/bin
make && make install && cd /opt
8) OpenMeetings application requires Adobe Flash Player for rooms.
yum install -y flash-plugin
9) Jodconverter participates in the process to convert uploaded files. The Java OpenDocument Converter, converts documents between different office formats. It leverages OpenOffice.org, which arguably provides the best import/export filters for OpenDocument and Microsoft Office formats available today. Word to OpenDocument Text (odt); OpenDocument Text (odt) to Word and etc.
cd /opt
wget -c https://storage.googleapis.com/google-code-archive-downloads/v2/code.google.com/jodconverter/jodconverter-core-3.0-beta-4-dist.zip
unzip jodconverter-core-3.0-beta-4-dist.zip
For, now we will leave it, and remember the path where was extracted.
10) Next, we will need to install FFmpeg. FFmpeg is a free software project that produces libraries and programs for handling multimedia data. FFmpeg works with video. We will now install the necessary packages, libraries and vlc player which is needed to play the meeting recordings.
yum install -y glibc alsa-lib-devel faac faac-devel faad2 faad2-devel gsm gsm-devel imlib2 imlib2-devel lame-devel vorbis-tools theora-tools libvpx-devel vlc autoconf automake cmake freetypedevel gcc gcc-c++ git libtool make mercurial nasm pkgconfig zlib-devel curl
(copy as one line and execute on server)
This ffmpeg compilation is based on this url, updated file versions 28-9-2016:
https://trac.ffmpeg.org/wiki/CompilationGuide/Centos
wget https://cwiki.apache.org/confluence/download/attachments/27838216/ffmpeg-centos2.sh
chmod a+rwx ffmpeg-centos2.sh
The installation can take up to 30 minutes to finish:
./ffmpeg-centos2.sh
When finished, please, go to step 11).
11) Installation MariaDB data server. MariaDB is a community-developed fork of the MySQL relational database management system intended to remain free under the GNU GPL. It is notable for being led by the original developers of MySQL, who forked it due to concerns over its acquisition by Oracle. You may use the default Oracle version or Percona, but that is up to you.
yum install -y mariadb-server
Now we are going to start MariaDB server (CentOS7):
systemctl start mariadb.service
service mariadb start <-- For CentOS 6
Now we need to set password for Root. Please, modify new-password by your own.
mysqladmin -u root password new-password
Note: You may edit /root/.my.cnf and configure password less access for MySQL, or use -u root -p command.
Make a database for OpenMeetings:
mysql -u root -p
MariaDB [(none)]> CREATE DATABASE open314 DEFAULT CHARACTER SET 'utf8';
Now we create a user with all permission on this open314 database.
MariaDB [(none)]> GRANT ALL PRIVILEGES ON open314.* TO 'nemanja'@'localhost' IDENTIFIED BY '123456' WITH GRANT OPTION;
(Only one line with space between both)
- open314 ............. name of the database
- nemanja ............. user for that database
- 123456 ...............password of that user
You can change the data...but remember it! Later we´ll need it. Now we leave MariaDB:
MariaDB [(none)]> quit
12) Installation of OpenMeetings.
We´ll install OpenMeetings in /opt/red5314. All the following information will be based in this
directory.
Call our folder of installation red5314
Make the folder:
mkdir -p /opt/red5314
cd /opt/red5314
Download the OpenMeetings installation archive:
wget -c http://apache.rediris.es/openmeetings/3.1.4/bin/apache-openmeetings-3.1.4.zip
unzip apache-openmeetings-3.1.4.zip
Save the unloaded file to /opt:
mv apache-openmeetings-3.1.4.zip /opt
Unload and install the connector between OpenMeetings and MariaDB:
cd /opt
wget http://repo1.maven.org/maven2/mysql/mysql-connector-java/5.1.39/mysql-connector-java-
5.1.39.jar
Now copy it to where must be:
cp /opt/mysql-connector-java-5.1.39.jar /opt/red5314/webapps/openmeetings/WEB-INF/lib
Now we are going to configure OpenMeetings for our database in MariaDB, by adjusting few lines:
nano /opt/red5313/webapps/openmeetings/WEB-INF/classes/META-INF/mysql_persistence.xml
Modify in line 71:
, Url=jdbc:mysql://localhost:3306/openmeetings31?
...to
, Url=jdbc:mysql://localhost:3306/open314?
That is name of the database that we did initially (previously).
On line 76, please modify:
, Username=root
...to
, Username=nemanja
The database user that we did initially for the database.
Modify in line 77:
, Password=" />
to
, Password=123456" />
It is the password that we did initially for the user "nemanja" in the database. So if initially you choose another name and password for the database, you will need to adjust them here.
We should protect the access to the file:
chmod 640 /opt/red5314/webapps/openmeetings/WEB-INF/classes/METAINF/mysql_persistence.xml
13) Script to launch red5-OpenMeetings.
We´ll download the script to run red5-OpenMeetings:
cd /opt
wget -c https://cwiki.apache.org/confluence/download/attachments/27838216/red5-3
Copy it to the init.d folder:
cp red5-3 /etc/init.d/
Add execution permission:
chmod +x /etc/init.d/red5-3
If you made the installation in a different path to /opt/red5314, please edit the script and
modify the line:
RED5HOME=/opt/red5314
TO
RED5HOME=/your-path-installation
(anyway review red5-3 file and make sure Paths are correctly adjusted)
14) Now is the time to load the installation in your browser, and start configuring the application. First let's restart MariaDB (or any other MySQL service which you have installed):
systemctl restart mariadb.service
service mariadb restart <-- CentOS 6
Let's run red5-OpenMeetings service:
/etc/init.d/red5-3 start
Please wait until the text “clearSessionTable: 0”, is prompted. Then, open your favorite Web Browser and load:
http://IP:5080/openmeetings/install
Where IP is the real IP address of your server. Make sure that port 5080 is opened within the firewall, if any is used. A page similar to this one will appear:
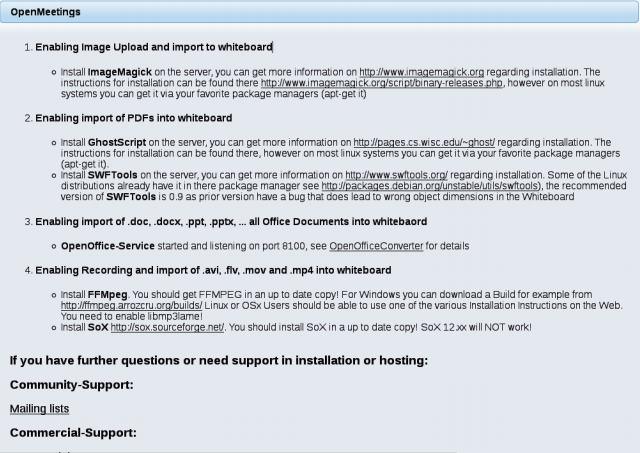
Push the >> (button). The next window will show the default database configuration with Derby, but we
have deployed MySQL (MariaDB), so that needs to be switched (adjusted):
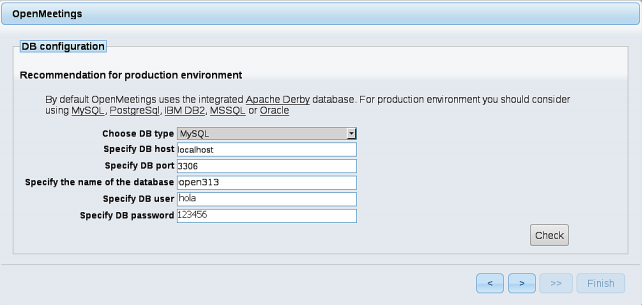
Click on > and proceed to the next menu.
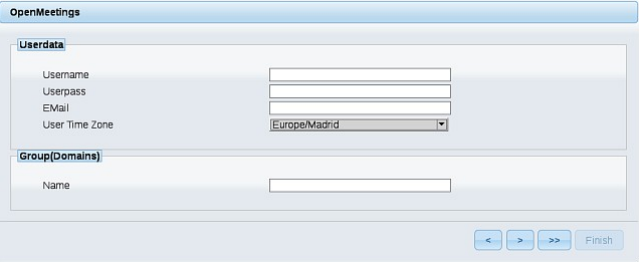
Here you need to fill up basic stuff, like:
Username = a-name ...this user will be administrator. Userpass = a-password ...for the previous user.
Email = email-adress ...of the previous user.
User Time Zone = country where is this server Name = example-openmeetings ...group name to choose.
When the installation is finished, we can configure the rest of settings.
Now go to bottom page and touch the '>>' button (double arrow). Will show this window:
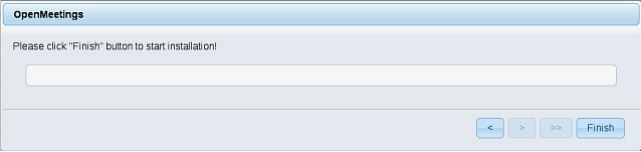
Click the Finish button, and wait a few seconds until the tables populate.
Next window will be this one:
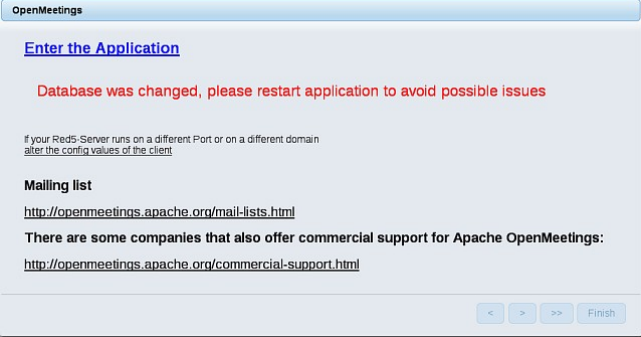
NOTE: Do not click on "Enter the Application" button. Open your terminal and push:
/etc/init.d/red5-3 restart
Now open browser and go to the:
http://IP:5080/openmeetings
Where IP is the real IP address of your server. Make sure that ports 1935 and 5080 are opened within firewall, if any are being used. A page will appear similar to this one:
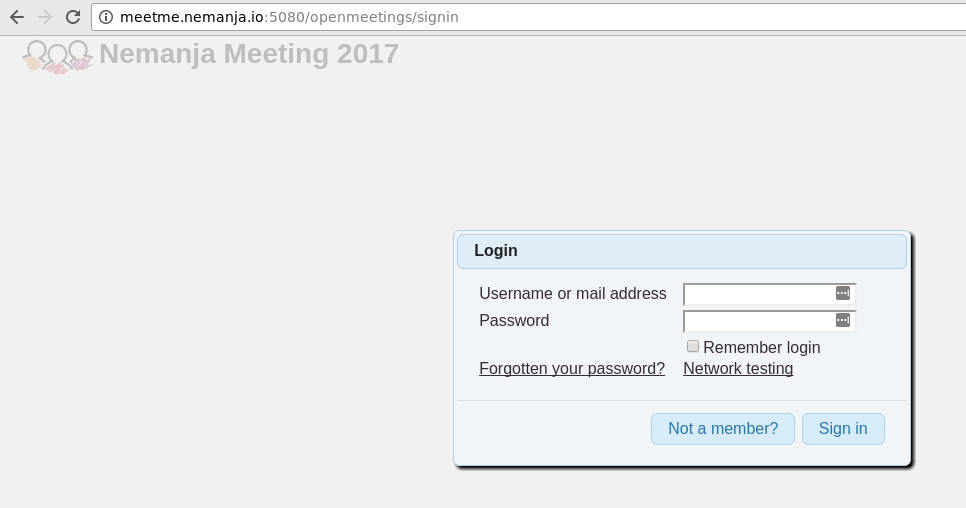
You can enter the username and password which you have defined previously and enter your Apache Open Meeting Dashboard for the first time! Congrats.
15) Important OpenMeetings's configuration:
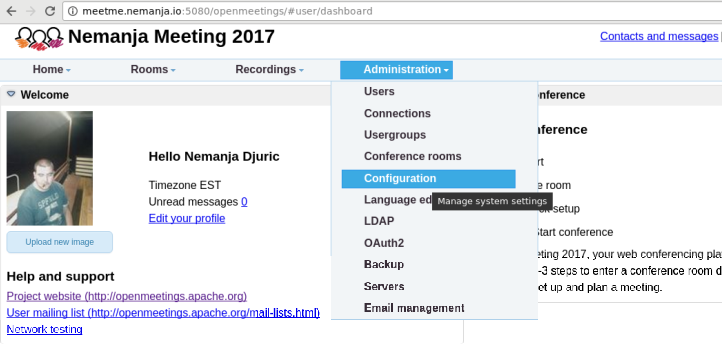
Next important settings to be adjusted are as described bellow:
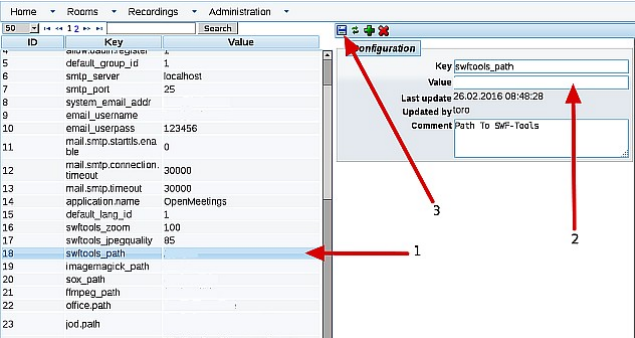
Click on: swftoolspath...and to the right in Value type: /usr/bin
Click on: imagemagickpath...and to the right in Value type: /usr/bin
Click on: soxpath...and to the right in Value type: /usr/local/bin
Click on: ffmpegpath...and to the right in Value type: /usr/local/bin
Click on: office.path...and to the right in Value type: /usr/lib64/libreoffice
Click on: jod.path...and to the right in Value type: /opt/jodconverter-core-3.0-beta-4/lib
NOTE: Remember to save after each change (arrow number 3, in the up screenshot). In case the jod.path field does not exist, (which I have a seen few times), you will need to add new and configure the path as described previously.
Your new virtual office is now configured and you can start configuring Rooms, Users and send invites. I have intentionally skipped SMTP configuration, because I believe that you already know how to configure an external SMTP user if needed (by default it is PHP Mailer). Soon I am planning to make an Ansible and Bash script installer for this amazing application, but until then feel free to follow my instructions. I would appreciate reviews, if possible.