Hello,
It's been a while since my last post. Today I would like to show how to setup Kubernetes cluster on AWS using their Elastic Kubernetes Service. In order to do that I have selected eksctl tool (https://eksctl.io/).
You can setup managed and non-managed type of cluster. Just to mention that if you select non-Managed you are going to be able to utilize Ubuntu or any other operating system, while AWS EKS Managed services are explicitly tied to AMIs based on AmazonLinux2023 OS.

What is Longhorn filesystem?
Longhorn is an open-source, lightweight, and highly available distributed block storage solution for Kubernetes. It provides persistent storage using containers and microservices to manage storage volumes across Kubernetes clusters. Longhorn ensures data replication across multiple nodes, making it resilient to hardware failures and node outages. It features incremental snapshots, backups, and easy volume recovery, making it ideal for applications requiring reliable and scalable storage in a Kubernetes environment.
Prerequisites:
- eksctl tool installed (https://eksctl.io)
- aws cli tool (https://aws.amazon.com/cli/)
- helm tool (https://helm.sh/docs/intro/install/)
- kubectl tool (https://kubernetes.io/docs/tasks/tools/install-kubectl-linux/)
- longhorn cli tool (https://longhorn.io/docs/1.7.0/deploy/install/#using-the-longhorn-command-line-tool)
Let's get started. First we will spin up fresh AWS EKS cluster. In my example setup I did a demo cluster with 8 worker nodes, where each Area Zone had 4.
Example of cluster.yaml file for eksctl tool is here:
apiVersion: eksctl.io/v1alpha5
kind: ClusterConfig

metadata:
  name: sqlscale
  region: us-east-1

availabilityZones: ["us-east-1a", "us-east-1b"]

addons:
  - name: vpc-cni
    version: latest
  - name: coredns
    version: latest
  - name: kube-proxy
    version: latest

managedNodeGroups:
  - name: sqlng-1
    instanceType: t2.medium
    instanceName: sqlscale-worker-1
    desiredCapacity: 4
    iam:
      attachPolicyARNs:
        - arn:aws:iam::aws:policy/AmazonEKSWorkerNodePolicy
        - arn:aws:iam::aws:policy/AmazonEKS_CNI_Policy
        - arn:aws:iam::aws:policy/AmazonEC2ContainerRegistryReadOnly
        - arn:aws:iam::aws:policy/ElasticLoadBalancingFullAccess
        - arn:aws:iam::aws:policy/AmazonSSMFullAccess
      withAddonPolicies:
        imageBuilder: true
        autoScaler: true
        externalDNS: true
        certManager: true
        appMesh: true
        appMeshPreview: true
        ebs: true
        fsx: true
        efs: true
        awsLoadBalancerController: true
        xRay: true
        cloudWatch: true
    volumeSize: 50
    volumeType: gp3
    ssh:
      allow: true # will use ~/.ssh/id_rsa.pub as the default ssh key
    privateNetworking: true
    labels: {role: worker}
    tags:
      nodegroup-role: worker
    preBootstrapCommands:
      # Install SSM Agent,NFS,Openiscsi and similar packages
      - "yum install -y amazon-ssm-agent"
      - "yum install nfs-utils -y"
      - "yum --setopt=tsflags=noscripts install iscsi-initiator-utils -y"
      - "yum install curl -y"
      - 'echo "InitiatorName=$(/sbin/iscsi-iname)" > /etc/iscsi/initiatorname.iscsi'
      - "systemctl enable iscsid"
      - "systemctl start iscsid"
      - "systemctl enable amazon-ssm-agent"
      - "systemctl start amazon-ssm-agent"
      # allow docker registries to be deployed as cluster service
      - "sed '2i \"insecure-registries\": [\"172.20.0.0/16\",\"10.100.0.0/16\"],'  /etc/docker/daemon.json"
      - "systemctl restart docker"
  - name: sqlng-2
    instanceType: t2.medium
    instanceName: sqlscale-worker-2
    desiredCapacity: 4
    iam:
      attachPolicyARNs:
        - arn:aws:iam::aws:policy/AmazonEKSWorkerNodePolicy
        - arn:aws:iam::aws:policy/AmazonEKS_CNI_Policy
        - arn:aws:iam::aws:policy/AmazonEC2ContainerRegistryReadOnly
        - arn:aws:iam::aws:policy/ElasticLoadBalancingFullAccess
        - arn:aws:iam::aws:policy/AmazonSSMFullAccess
      withAddonPolicies:
        imageBuilder: true
        autoScaler: true
        externalDNS: true
        certManager: true
        appMesh: true
        appMeshPreview: true
        ebs: true
        fsx: true
        efs: true
        awsLoadBalancerController: true
        xRay: true
        cloudWatch: true
    volumeSize: 50
    volumeType: gp3
    ssh:
      allow: true # will use ~/.ssh/id_rsa.pub as the default ssh key
    privateNetworking: true
    labels: {role: worker}
    tags:
      nodegroup-role: worker
    preBootstrapCommands:
      # Install SSM Agent,NFS,Openiscsi and similar packages
      - "yum install -y amazon-ssm-agent"
      - "yum install nfs-utils -y"
      - "yum --setopt=tsflags=noscripts install iscsi-initiator-utils -y"
      - "yum install curl -y"
      - 'echo "InitiatorName=$(/sbin/iscsi-iname)" > /etc/iscsi/initiatorname.iscsi'
      - "systemctl enable iscsid"
      - "systemctl start iscsid"
      - "systemctl enable amazon-ssm-agent"
      - "systemctl start amazon-ssm-agent"
      # allow docker registries to be deployed as cluster service
      - "sed '2i \"insecure-registries\": [\"172.20.0.0/16\",\"10.100.0.0/16\"],'  /etc/docker/daemon.json"
      - "systemctl restart docker"
** Feel free to edit various settings. This example has what is required to install and setup AWS EKS cluster with Longhorn filesystem successfully.
You can check following page for other possible options to integrate into your cluster.yaml file:
https://eksctl.io/usage/creating-and-managing-clusters/
Export your AWS Secret and Access keys in Shell or configure it with aws configure
Push to following command to provision your AWS EKS cluster:
eksctl create cluster -f cluster.yaml
It takes a while to complete, so sit back and monitor your terminal screen output.
Once AWS EKS Cluster is ready and you have tested kubectl we are going to use longhornctl tool to install and set up the preflight dependencies before installing Longhorn.
./longhornctl --kube-config='/home/nemke/.kube/config' install preflight
Output:

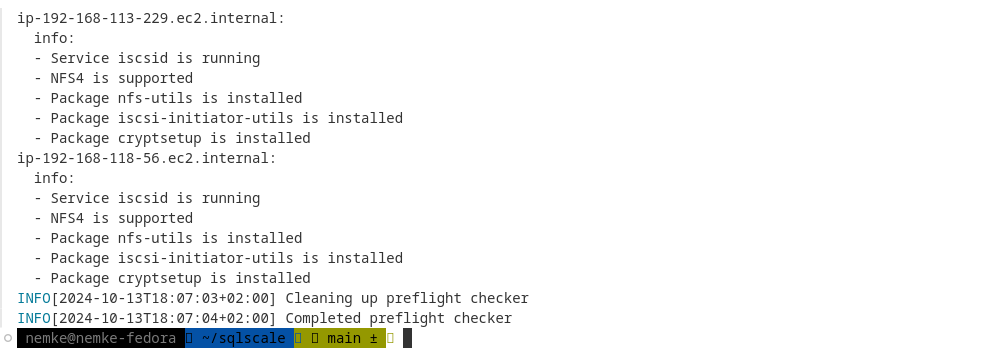
You may check if all software is installed using following command:
./longhornctl --kube-config='/home/nemke/.kube/config' check preflight
Output:
Words of wisdom here.... Well, if you plan to use HPA (Horizontal Pod Autoscaler) with AWS EKS Autoscaling groups, I advise that you make sure that all packages are getting installed within cluster.yaml file. Why? Well, eksctl tool is using CloudFormattion so any new node added will get packages installed before new node joins your fleet.
Next we will install Longhorn filesystem and configure it.
Add the Longhorn Helm repository:
helm repo add longhorn https://charts.longhorn.io
Fetch the latest charts from the repository:
helm repo update
Install Longhorn in the longhorn-system namespace:
helm install longhorn longhorn/longhorn --namespace longhorn-system --create-namespace --version 1.7.0
Output:
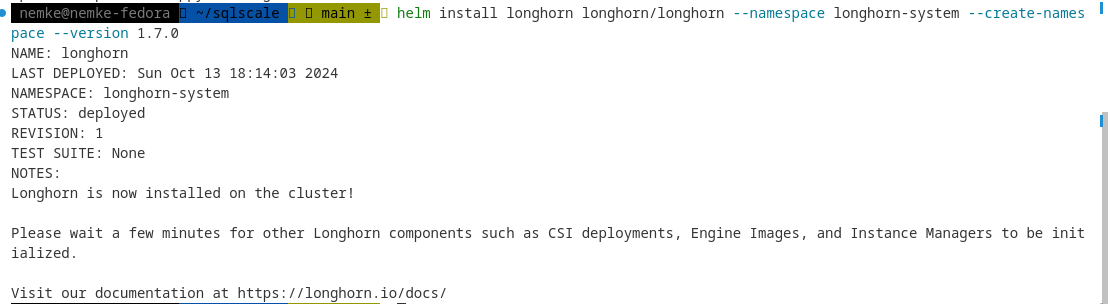
To confirm that the deployment succeeded, run:
kubectl -n longhorn-system get pod
One of the super neat features I've seen with Longhorn is its UI. To enable access to the Longhorn UI, you will need to set up an Ingress controller. Authentication to the Longhorn UI is not enabled by default. For information on creating an NGINX Ingress controller with basic authentication, refer to the following link: https://longhorn.io/docs/1.7.0/deploy/accessing-the-ui/longhorn-ingress
If you install Longhorn on a Kubernetes cluster with kubectl or Helm, you will need to create an Ingress to allow external traffic to reach the Longhorn UI.
Authentication is not enabled by default for kubectl and Helm installations. In these steps, you’ll learn how to create an Ingress with basic authentication using annotations for the nginx ingress controller.
1) Create a basic auth file auth. It’s important the file generated is named auth (actually - that the secret has a key data.auth), otherwise the Ingress returns a 503.
USER=<USERNAME_HERE>; PASSWORD=<PASSWORD_HERE>; echo "${USER}:$(openssl passwd -stdin -apr1 <<< ${PASSWORD})" >> auth
2) Create a secret:
kubectl -n longhorn-system create secret generic basic-auth --from-file=auth
3) Create an Ingress manifest longhorn-ingress.yml:
apiVersion: networking.k8s.io/v1
kind: Ingress
metadata:
  name: longhorn-ingress
  namespace: longhorn-system
  annotations:
    # type of authentication
    nginx.ingress.kubernetes.io/auth-type: basic
    # prevent the controller from redirecting (308) to HTTPS
    nginx.ingress.kubernetes.io/ssl-redirect: 'false'
    # name of the secret that contains the user/password definitions
    nginx.ingress.kubernetes.io/auth-secret: basic-auth
    # message to display with an appropriate context why the authentication is required
    nginx.ingress.kubernetes.io/auth-realm: 'Authentication Required '
    # custom max body size for file uploading like backing image uploading
    nginx.ingress.kubernetes.io/proxy-body-size: 10000m
spec:
  ingressClassName: nginx
  rules:
  - host: longhorn.example.com
    http:
      paths:
      - pathType: Prefix
        path: "/"
        backend:
          service:
            name: longhorn-frontend
            port:
              number: 80
** As you may notice I've used longhorn.example.com as a URL to login to the Longhorn UI from my browser. You may adjust it to real domain name with DNS, but it is not required because we can use /etc/hosts mechanism to access it.
4) Create the Ingress:
kubectl -n longhorn-system apply -f longhorn-ingress.yml
You will need to create an ELB (Elastic Load Balancer) to expose the nginx Ingress controller to the Internet. Additional costs may apply.
5) Let's create ELB using following command:
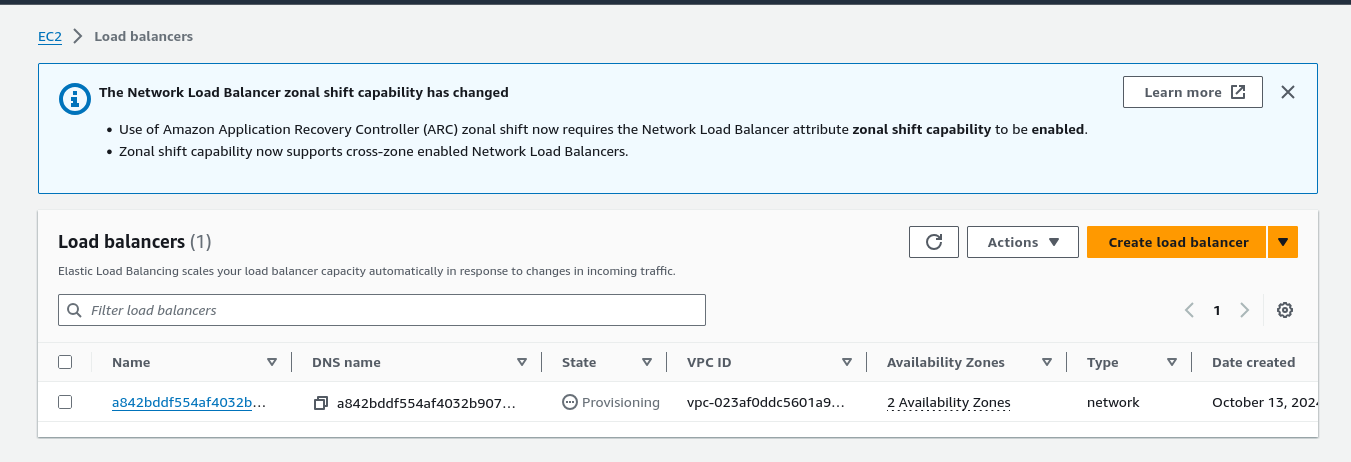
kubectl apply -f https://raw.githubusercontent.com/kubernetes/ingress-nginx/main/deploy/static/provider/aws/deploy.yaml
** You may use Helm to deploy this or adjust ELB settings, but for the purpose of this Demo and UI I've used default values.
You can now navigate to AWS Console --> EC2 --> Load Balancer area, and you will notice that Load Balancer is being provisioned:
Grab two IP addresses assigned to your new Load Balancer, and adjust your /etc/hosts file with the following data:
52.86.18.142 longhorn.example.com
44.208.155.179 longhorn.example.com
You can dig DNS endpoint to get them.
Navigate to the following URL to get to the Longhorn UI:
https://longhorn.example.com
(ignore SSL errors of course)
Enter username and password that you have defined in the Create a basic auth file auth step.
Output:
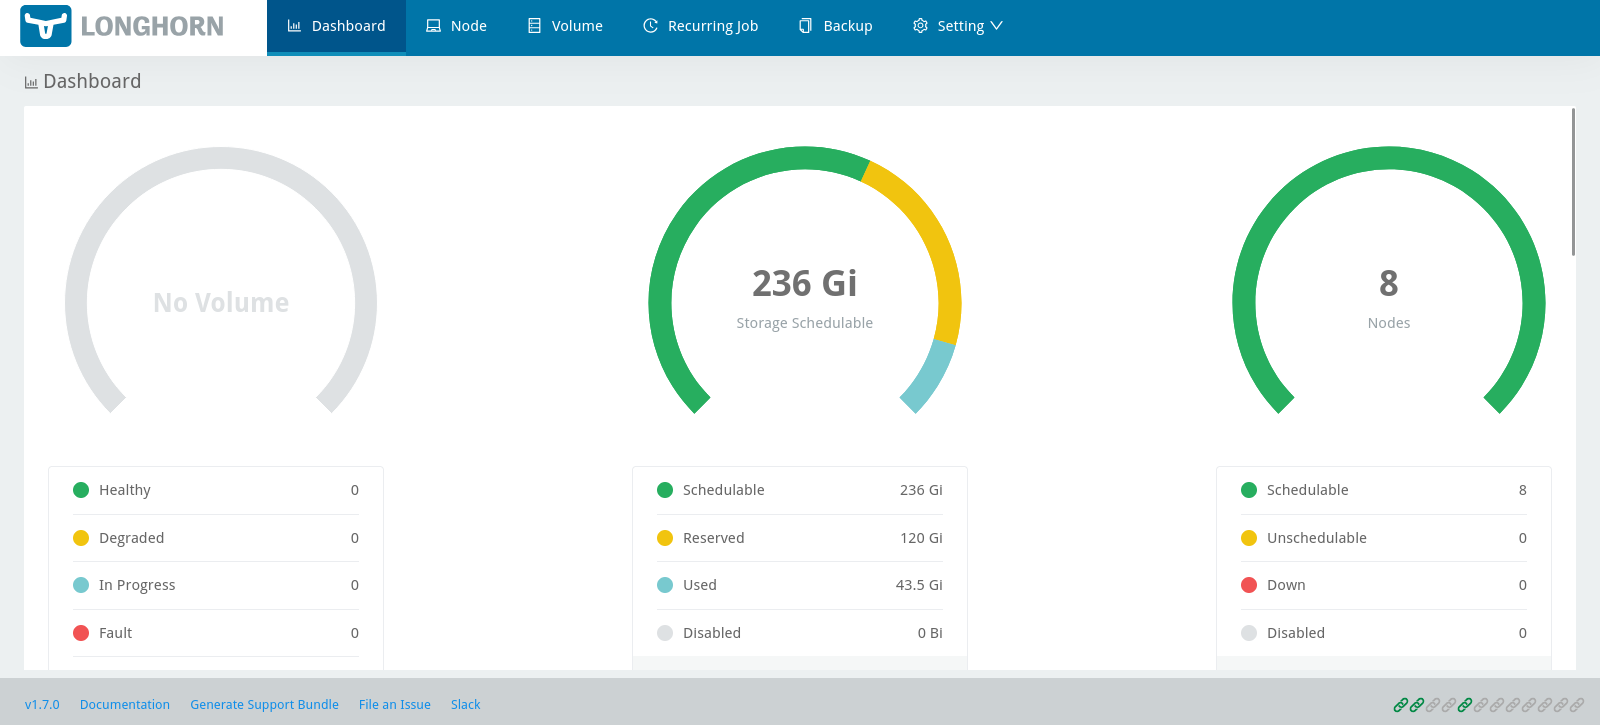
Welcome to Longhorn UI. No errors, and as you can see 8 nodes in the group (4 workers us-east-1a and 4 workers in us-east-1b). Feel free to explore https://longhorn.io/docs/1.7.0/ docs pages, but the most basic is to visit Settings --> General area and adjust what is default number of replicas you wish to keep for each Volume that is created followed by PV/PVC from your Kubernetes deployment.
That's it for now. In next articles, we will use this setup to provision MariaDB server with Master/Slave replicas,and then MariaDB server "Galera" with Master/Master replicas.
Hope this article helps! Good luck!