Lately, I have been working with a lot of customised virtual machines based mostly on the KVM/XEN technology. The one really popular and easy to manage is from company SolusVM (recently purchased by OnApp) http://solusvm.com/. The most of the commercial hosting companies are using it nowadays. If you are deploying Master/Slave solution which KVM requires, you will find default templates on the following page here: https://tdn.solusvm.com/. But what if we want to create our own, custom KVM template with pre-installed software/configuration. In this article, I will describe how you can create your own custom KVM template designed for the SolusVM virtualization software.
1) Download and boot CentOS 6 or 7 minimal iso files and upload to the /home/solusvm/kvm/iso folder on the MASTER SolusVM server.
2) In SolusVM Dashboard go to Media --> Add ISO fill in all details, leaving PAE as 'off'

3) Go back to the Media section and click on the 'Media Sync' option. Select 'CREATE', scroll down to the bottom of the page and in the ISOS section select ISO files, on the left side you wish to synchronise and the nodes on the right side where files will be copied.
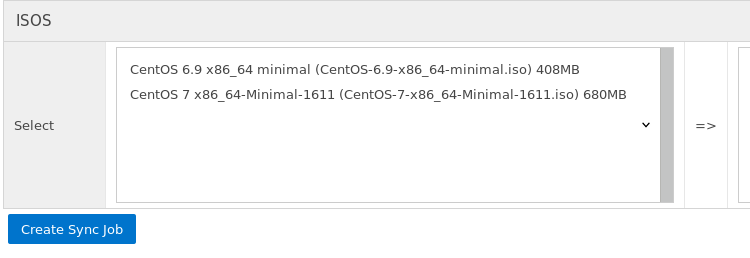
You will then see:
Successful! Sync job added
You can go back, click on 'Media Sync' again and check the status of the synchronisation. Alternatively, you can log in to the KVM Slave node, and watch the curl process. It will show as something like this:
curl -vvv --stderr /usr/local/solusvm/tmp/bc3x3ea4e26e5xe1af1408321416x956113a46x58763.log --insecure https://x.x.x.x:5656/9bxebcaxf01d29abf5xa6x39fc3ca6199ce7d9c7d2fd/CentOS-7-x86_64-Minimal-1611.iso -o /home/solusvm/xen/iso/CentOS-7-x86_64-Minimal-1611.iso
Note: Make sure that the primary partition on the KVM Slave Hypervisors has enough space to store both ISO and fresh template data. By default that partition is 60Gb, but please check before pushing anything, to make sure.
4) Go to 'Virtual server' tab --> Select 'Add new Server' and select KVM.
5) Leave the 'Template' tab set to
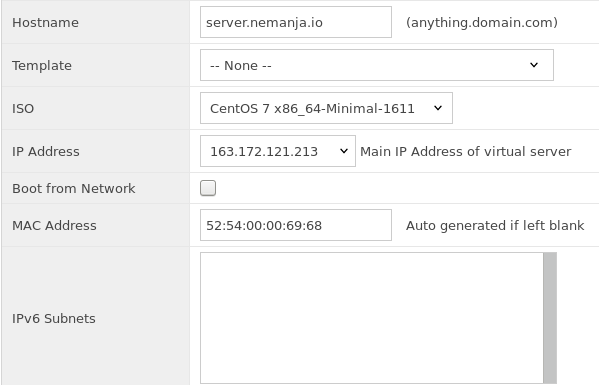
Click 'ADD'. On the next screen, you will be prompted to enter the VNC password, port number and IP address, but you can ignore that since you will finish the installation from within the main SolusVM dashboard which is already authenticated.
6) Go back to 'Virtual Servers' --> 'List servers' and click on VNC to load the installation screen. Chrome seems to have some difficulties, so you can use Firefox, which works perfectly.
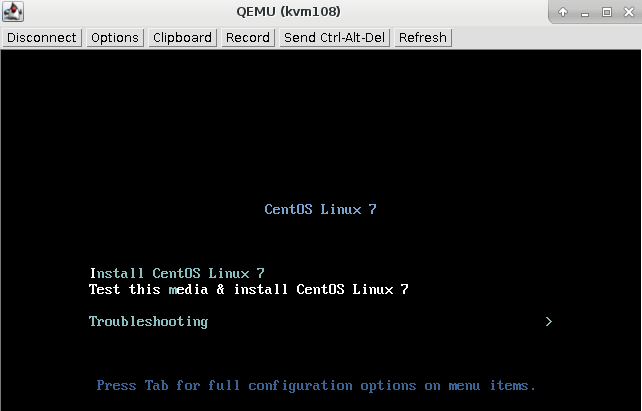
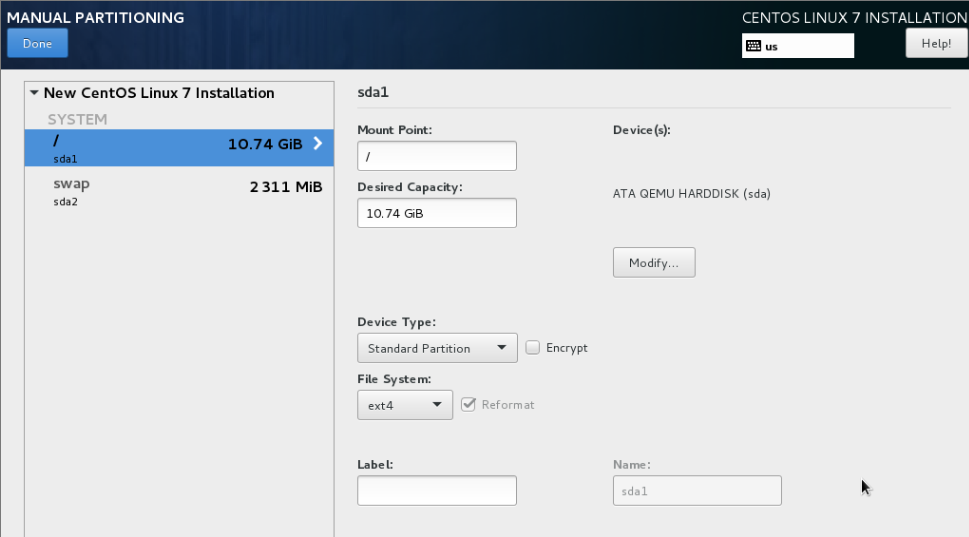
7) Select 'Language' and proceed. On the config screen, you can configure things like Date/Timezone, Keyboard, Security policies, but the most important part here is to click on the INSTALLATION DESTINATION and check "I WILL CONFIGURE PARTITIONING". The reason for this is because if you leave it on the automatic option, it will configure LVM instead of IDE, and we need IDE partitioning so that later the /scripts/kvmtemplate script can configure the SolusVM template properly.
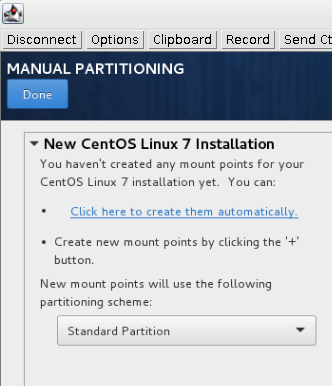
Next you will be prompted with a "+" button down so you can start manually creating partitions. In my case, I want every custom cPanel installation to have 11GB for the "/" Root partition and 2GB for SWAP. You may adjust this, since the template will be Generation 2 anyway which gives the option to resize the partition for new virtual servers. This step is just to avoid LVM at all costs.
8) Click on the 'NETWORK & HOSTNAME' option and enable it by selecting 'ON'.
9) While the installation is running, you can set your Root password and create additional users (if needed). When SolusVM KVM template is created, the password will be changed to something random.
10) When the OS installation complete, click 'REBOOT' and if everything is fine, you should get to the CentOS 7 login.
11) Login as root and type your previously chosen password. Occasionally the network adapter is not properly added, so if when you type:
ip addr show
You see something like:
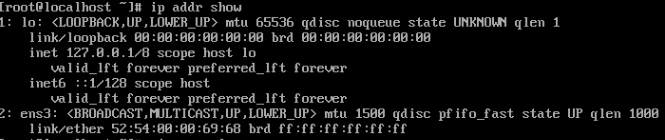
Go back to the SolusVM Dashboard and click 'Re-Configure' at the top of the page. Please wait for the system to finish. You will see on your screen. Virtual Server Re-Configured! System Files Changed:
/etc/sysconfig/network
/etc/sysconfig/network-scripts/ifcfg-eth0
/etc/sysconfig/network-scripts/route-eth0
/etc/resolv.conf
/etc/hosts
90% of the time after that you will be able to bring the IP address up and continue work from your local computer terminal. If not, log back into the VNC console and go to the /etc/sysconfig/network-scripts folder, and copy ifcfg-ens3 to ifcfg-ens3.bak and then cp ifcfg-eth0 to efcfg-ens3. Click on 'reboot' from the VNC console, go back and type:
ip addr show
To see if the address is assigned properly. Always ping a site, I often do google.rs or google.com, which are safe.
12) Log in as root from your local computer using SSH, port 22.
13) type yum update to update the kernel and software to the latest version.
14) type reboot
15) Make adjustments on the server and type halt to power off the server.
16) On the KVM Slave node where this instance is settled type:
/scripts/kvmtemplate --mode=prescan --vmid=kvm108 --generation=2
- Where kvm108 is real the KVM ID your server is using.
Output will be similar to this:
Name Type VFS Label MBR Size Parent UUID
/dev/sda1 filesystem ext4 - - 11G - 7cad89f1-23d6-4a74-aa98-926c4626a6f9
/dev/sda2 filesystem swap - - 2.0G - 3c13d689-bca8-4709-8ace-28a53fce7e96
/dev/sda1 partition - - 83 11G /dev/sda -
/dev/sda2 partition - - 82 2.0G /dev/sda -
/dev/sda device - - - 13G - -
From this, we now know that the primary partition is using /dev/sda1 and that SWAP must use /dev/sda2
Note: This is very important because when you create the KVM Template from within the SolusVM dashboard you need to enter the proper partition number for the Resizable and SWAP partition. If you use QEMU-KVM (or virt-manager GUI) for running your virtual machines, you can specify a disk driver to be used for accessing the machine’s disk image. By default, IDE is selected, but VirtIO is a very popular choice as well. From my experience, VirtIO is giving better performance, but IDE is more stable, but this is my personal opinion, you may switch to the VirtIO during the CentOS 7 installation process.
17) On the host node you will need to mount the virtual server's partitions:
kpartx -a /dev/VOLUME_GROUP/KVMID_img
mount /dev/mapper/VOLUME_GROUP-KVMID_img1 /mnt
In my case that was:
kpartx -a /dev/system/kvm108img
mount /dev/mapper/system-kvm108img1 /mnt
(you notice that we mounted _kvm1, well that is partition 1 or the space reserved for Root system)
18) Jump to the /mnt/etc folder and edit fstab file. The file will look like:
#
# /etc/fstab
# Created by anaconda on Sun May 7 13:24:19 2017
#
# Accessible filesystems, by reference, are maintained under '/dev/disk'
# See man pages fstab(5), findfs(8), mount(8) and/or blkid(8) for more info
#
UUID=7cad89f1-23d6-4a74-aa98-926c4626a6f9 / ext4 defaults 1 1
UUID=3c13d689-bca8-4709-8ace-28a53fce7e96 swap swap defaults 0 0
You need to adjust it to:
/dev/sda1 / ext4 defaults 1 1
/dev/sda2 swap swap defaults 0 0
19) Save file and then, let's remove bash history:
rm -f /mnt/root/.bash_history
20) Some distros need the following to get networking working (CentOS6 and older Debian versions):
rm /mnt/etc/udev/rules.d/70-persistent-net.rules
touch /mnt/etc/udev/rules.d/70-persistent-net.rules
chattr +i /mnt/etc/udev/rules.d/70-persistent-net.rules
21) Unmount the virtual server:
cd ~
umount /mnt
22) Remove the mappings:
kpartx -d /dev/VOLUME_GROUP/KVMID_img
In my case:
kpartx -d /dev/system/kvm108_img
23) Now, everything is ready for the KVM template to be created:
/scripts/kvmtemplate --mode=prepare --vmid=kvm108 --generation=2
Once the source virtual server is ready to be packaged you simply run the package scripts. Example:
/scripts/kvmtemplate --mode=package --vmid=kvm101 --generation=2
It may take a while for it to complete. Once it's done you will be given a location and file name for the template. Example, in my case, is:
Copy to destination and make sparse ...

Sparsify operation completed with no errors. Before deleting the old
disk, carefully check that the target disk boots and works correctly.

Creating template. Please wait...
Template: /home/solusvm/kvm/template/template-3fa91718ef6628e568a4eb4eba7c2f083c888f3e.gz
The next step is to rename the template. Example:
cd /home/solusvm/kvm/template/
mv template-3fa91718ef6628e568a4eb4eba7c2f083c888f3e.gz linux-centos-7-x86_64-custom-gen2-v1.gz
or if it was a Windows template:
cd /home/solusvm/kvm/template/
mv template-149fee41d5801f96368c959a00dd6092a56ba031.gz windows-2008-server-r2-custom-x86_64-gen2-v1.gz
Note: It is really important to delegate name of the template properly. You may freely follow my example naming it as custom-gen2, custom1-gen2... etc and then add proper descriptions within the SolusVM Main dashboard. I have tried making custom names, and that never worked.
rsync gz archive and send it to the SolusVM Master node under the /home/solusvm/kvm/template/ folder.
Note: Remove it on the current node after the archive is sent to the Master node. It will return back naturally when Media Sync is pushed.
Finally, make sure when adding the template to SolusVM you specify the correct generation and partition to resize. Go back to the Media section and click on the 'Media Sync' option. Select CREATE, scroll down to the bottom where KVM Templates are stored and select a new template on the left side and the nodes on the right side where it needs to be copied (synchronised) -- (See Step 3. in this document)
24) Wait again for the new template to get synced on the nodes. After that step, you can go to the Virtual Servers section and provision your first server with customised KVM template prepared for the SolusVM software.
I hope this article will be helpful to anyone who wish to automate the vps deployment process and use QCOW2/KVM environment. I am starting soon http://vmtemplates.com website where I plan with really small amount to deploy many ready made templates for all type of virtual machines.
Good luck!