Hello folks. Recently I was hired by my good friend to migrate his data from the old server which was running from 2016. Back then we installed OpenVZ platform with some freeware GUI and Webmin and deployed several Virtual machines on it. It was/is working perfectly, but I had to move it to something newer as technology grows. He rented a server from a known provider in Europe called Hetzner AG. The server seems to be powerful with Intel Skylake processor and NVME drives. I was pretty impressed until I've realized that I can't install Debian/Ubuntu on it and simply move forward with Proxmox as freeware KVM/Xen solution so I had to think of different ways to accomplish my mission. Started reading about the virsh tool which is using libvirt as a base (https://libvirt.org/).
The virsh program is the main interface for managing virsh guest domains. The program can be used to create, pause, and shutdown domains. It can also be used to list current domains. Libvirt is a C toolkit to interact with the virtualization capabilities of recent versions of Linux (and other OSes). It is free software available under the GNU Lesser General Public License. Virtualization of the Linux Operating System means the ability to run multiple instances of Operating Systems concurrently on a single hardware system where the basic resources are driven by a Linux instance. The library aims at providing a long term stable C API . It currently supports Xen, QEmu, KVM , LXC , OpenVZ, VirtualBox and VMware ESX .
First started with minimal CentOS 7.6 installation. Depending on the Datacenter used that can be achieved on many ways. Hetzner has their auto installer so this part was almost automatized.
Step [1] - Checking hardware compatibility -
Next thing we need to make sure that Virtualization Technology (VT) is enabled in your server’s BIOS.
To test from shell:
[root@CentOS-76-64-minimal ~]# lscpu | grep Virtualization
Virtualization:        VT-x
[root@CentOS-76-64-minimal ~]# hostname
CentOS-76-64-minimal
[root@CentOS-76-64-minimal ~]# date
Mon Apr 22 06:16:43 CEST 2019
If you get the empty response you will probably need to ask your provider to get that option enabled or if available do that by yourself on site, using IPMI or etc.
Step [2] - YUM and installing packages -
yum update
Restart server and then push:
yum install qemu-kvm libvirt libvirt-python libguestfs-tools virt-install
Start and enable the libvirtd service:
systemctl enable libvirtd
systemctl start libvirtd
Step [2] - Verify kvm installation -
Make sure KVM module loaded using lsmod command and grep command:
lsmod | grep -i kvm
Valid output is:
[root@CentOS-76-64-minimal ~]# lsmod | grep -i kvm
kvm_intel             183705  38
kvm                   615914  1 kvm_intel
irqbypass              13503  7 kvm
Step [3] - Configure bridged networking -
By default DHCP based network bridge configured by libvirtd. Well, what is the bridge?
A bridge is a device that separates two or more network segments within one logical network (e.g. a single IP-subnet).
A bridge is usually placed between two separate groups of computers that talk with each other, but not that much with the computers in the other group. A good example of this is to consider a cluster of Macintoshes and a cluster of Unix machines. Both of these groups of machines tend to be quite chatty amongst themselves, and the traffic they produce on the network causes collisions for the other machines who are trying to speak to one another.
The job of the bridge is to examine the destination of the data packets one at a time and decide whether or not to pass the packets to the other side of the Ethernet segment. The result is a faster, quieter network with fewer collisions.
The bridging code decides whether to bridge data or to drop it not by looking at the protocol type (IP, IPX, NetBEUI), but by looking at the MAC-address unique to each NIC.
Important: It's vital to understand that a bridge is neither a router nor a firewall. Spoken in simple term a bridge behaves like a network switch (i.e. Layer 2 Switch), making it a transparent network component (which is not absolutely true, but nearly).
You can verify that with the following commands:
brctl show
virsh net-list
Output:
[root@CentOS-76-64-minimal ~]# brctl show
bridge name    bridge id       STP enabled interfaces
br0        8000.b42e99481ead   no      eno1
                            vnet0
                            vnet1
                            vnet2
virbr0        8000.525400535849   yes     virbr0-nic

[root@CentOS-76-64-minimal ~]# virsh net-list
 Name                 State      Autostart     Persistent
----------------------------------------------------------
 default              active     yes           yes
Now, I already have some virtual machines on this server so it is normal to have a br0 device. Otherwise, it is perfectly fine to have virbr0 or "Virtual Bridge 0" interface is used for NAT (Network Address Translation). It is provided by the libvirt library, and virtual environments sometimes use it to connect to the outside network.
All VMs (guest machine) only have network access to other VMs on the same server. A private network 192.168.122.0/24 created for you. Verify it:
virsh net-dumpxml default
The normal output is:
[root@CentOS-76-64-minimal ~]# virsh net-dumpxml default
<network>
  <name>default</name>
  <uuid>0fc9b244-06f5-42d4-a7d1-09fe4bc6f14e</uuid>
  <forward mode='nat'>
    <nat>
      <port start='1024' end='65535'/>
    </nat>
  </forward>
  <bridge name='virbr0' stp='on' delay='0'/>
  <mac address='52:54:00:53:58:49'/>
  <ip address='192.168.122.1' netmask='255.255.255.0'>
    <dhcp>
      <range start='192.168.122.2' end='192.168.122.254'/>
    </dhcp>
  </ip>
</network>
Note: You can change/adjust this range to whatever you like by editing network ranges or default MAC address (if needed) by using net-edit command. Here is a useful doc page from libvirt site on how you can use it: https://libvirt.org/sources/virshcmdref/html/sect-net-edit.html
If you want your VMs available to other servers on your LAN, set up a network bridge on the server that connected to your LAN. Now, this part is critical.
1) First what I personally advise is to disable NetworkManager. It usually overwrites the file within /etc/sysconfig/network-scripts which we need to manually modify so we actually don't need that service on our kvm/qemu host.
systemctl stop NetworkManager
systemctl disable NetworkManager
Now, cd into /etc/sysconfig/network-scripts folder and simple list of files.
[root@CentOS-76-64-minimal network-scripts]# ls
ifcfg-br0   ifdown-bnep  ifdown-ipv6  ifdown-routes  ifup-aliases  ifup-ippp  ifup-plusb   ifup-sit          network-functions
ifcfg-eno1  ifdown-eth   ifdown-isdn  ifdown-sit     ifup-bnep     ifup-ipv6  ifup-post    ifup-tunnel       network-functions-ipv6
ifcfg-lo    ifdown-ib    ifdown-post  ifdown-tunnel  ifup-eth      ifup-isdn  ifup-ppp     ifup-wireless     route-br0
ifdown      ifdown-ippp  ifdown-ppp   ifup           ifup-ib       ifup-plip  ifup-routes  init.ipv6-global
In my example with Hetzner server, we had ifcfg-eno1 interface which needs to be modified. Based on my experiences I've chosen MAC Driven Linux bridge method which I am going to explain soon.
[root@CentOS-76-64-minimal network-scripts]# cat ifcfg-eno1
### Hetzner Online GmbH installimage
# device: eth0
DEVICE=eno1
BOOTPROTO=static
HWADDR=b4:2e:99:48:1e:ad
ONBOOT=yes
BRIDGE=br0
And edited/created ifcfg-br0 file with following content:
[root@CentOS-76-64-minimal network-scripts]# cat ifcfg-br0
DEVICE=br0
TYPE="Bridge"
BOOTPROTO=static
IPADDR=78.46.89.244
NETMASK=255.255.255.224
SCOPE="peer 78.46.89.225"
ONBOOT=yes
DELAY=0
Vital points here:
- HWADDR describes real MAC so you need to enter real MAC within eno1 (or eth0) network configuration file.
- BRIDGE=br0 is added so Bridge can communicate with the outside world through the eno1 port.
- SCOPE is added which is peer to the gateway port. In the case of Hetzner AG DC, it was needed.
And lastly from the networking part, there is route-br0 file configured in this way:
[root@CentOS-76-64-minimal network-scripts]# cat route-br0
### Hetzner Online GmbH installimage

ADDRESS0=0.0.0.0
NETMASK0=0.0.0.0
GATEWAY0=78.46.89.225
Note: Again, there is a gateway0 part which you need to adjust as per your data center settings.
Step [4] - Create your first virtual machine -
I am going to create a CentOS 7.x VM. First, grab CentOS 7.x latest ISO image using the wget command:
cd /var/lib/libvirt/boot/
wget -c https://mirrors.edge.kernel.org/centos/7.6.1810/isos/x86_64/CentOS-7-x86_64-Minimal-1810.iso
Note: You can visit https://mirrors.edge.kernel.org/centos link with browser to select desired CentOS7 version or any other you wish to install.
In my next example, as done on the live/production server I am going to deploy the first virtual machine.
virt-install --virt-type=kvm --name server.radio-uzivo.com --ram 32768 --vcpus=16 --os-variant=centos7.0 --cdrom=/var/lib/libvirt/boot/CentOS-7-x86_64-Minimal-1810.iso --network=bridge=br0,model=virtio --graphics vnc --disk path=/var/lib/libvirt/images/centos7.qcow2,size=300,bus=virtio,format=qcow2
Note: To elaborate. This is a 32gb ram virtual machine with 16 CPUs and 300gb of HDD.
--ram 32768
--vcpus=16
path=/var/lib/libvirt/images/centos7.qcow2,size=300,bus=virtio,format=qcow2
Rest is really self-explanatory and can be modified as per specific needs.
While pushed that command, keep the screen (Ssh terminal running), open new tab and let's see what VNC port is assigned, so we can finish this installation from VNC GUI style.
virsh dumpxml server.radio-uzivo.com | grep vnc
The desired output is:
[root@CentOS-76-64-minimal network-scripts]# virsh dumpxml server.radio-uzivo.com | grep vnc
    <graphics type='vnc' port='5900' autoport='yes' listen='127.0.0.1'>
Now, that we know these facts you can sign off from the same terminal, load another one and login to server using SSH Tunnel:
ssh root@x.x.x.x -L 5900:127.0.0.1:5900
Note: where x.x.x.x needs to be the real IP address of your's server.
Keep the terminal running (1st and 2nd), load favorite VNC Viewer tool (I am using TigerVNC on Linux, but you can load any), and connect to the GUI interface using 127.0.0.1:5900 address.
Initial screen (example):
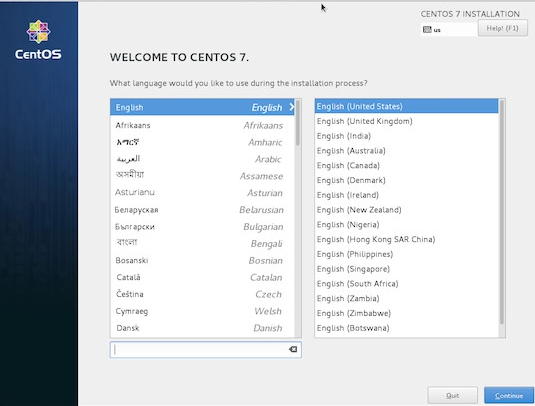
Using mouse please finish partitioning and networking part and to define dummy/plain password which you can use later to configure networking within the virtual machine. Usually, it is fine to put 123456 as a password at this point so you can easily type it on the next reboot. Finish installation and reboot the virtual machine (server).
Login as root user from VNC interface, and let's configure networking there
Network (on the virtual machine):
1) systemctl stop NetworkManager
2) systemctl disable NetworkManager
3) [root@server network-scripts]# cat ifcfg-eth0
TYPE="Ethernet"
BOOTPROTO="none"
DEFROUTE="yes"
DEVICE="eth0"
NAME="eth0"
IPADDR="x.x.x.x"
PREFIX="24"
GATEWAY="x.x.x.x"
HWADDR="00:50:56:00:96:2E"
NETMASK="255.255.255.224"
(example - get MAC and additional IP data from Hetzner panel or your vendor/provider)
Note:
it is critical that you enter valid MAC address, IPADDR, and GATEWAY.
Swap back to the Host SSH terminal. We will now configure MAC address there as well:
virsh edit server.radio-uzivo.com
Adjust real MAC address and save it (it is a vi editor so basically press : and x)
Once you are back on shell (#), please execute:
virsh destroy server.radio-uzivo.com
virsh start server.radio-uzivo.com
At this point, you may open a new ssh tab and test additional IP address by ping tool. If you get a response, you can now safely ssh into virtual machine from your local computer, configure new root password and finish installation of other applications needed.
Free addon (tip). My good friend (https://apawel.me) who is experienced sysadmin recommended that before starting with libvirt and qemu installation grab a valid centos qemu ev package from http://mirror.centos.org/centos/7/virt/x86_64/kvm-common/centos-release-qemu-ev-1.0-1.el7.noarch.rpm address. In this case the yum command line needs to be changed to:
yum install qemu-kvm-ev virt-install libvirt cifs-utils
Besides that, his recommendation is to enable KSM if you plan to overuse (oversell) hardware:
echo 1 > /sys/kernel/mm/ksm/run
Note: place line in the /etc/rc.local to make it permanent.
echo 'vm.swappiness = 10' > /etc/sysctl.d/00-swappiness.conf
In the next article we will focus on how to deploy virtual machines using Cloud-Init (https://cloudinit.readthedocs.io/en/latest/) method, so please stay tuned. I hope this article helps :) Cheers.